这是什么
近日,打卡更新方式,由之前转移到了某一新平台上。求知欲驱使进行研究。写的不周,还请包含,同时我要非常感谢lockey中的一位热心朋友不厌其烦地为我指点迷津。
如何实现
第一步
首先是获取签到的数据。
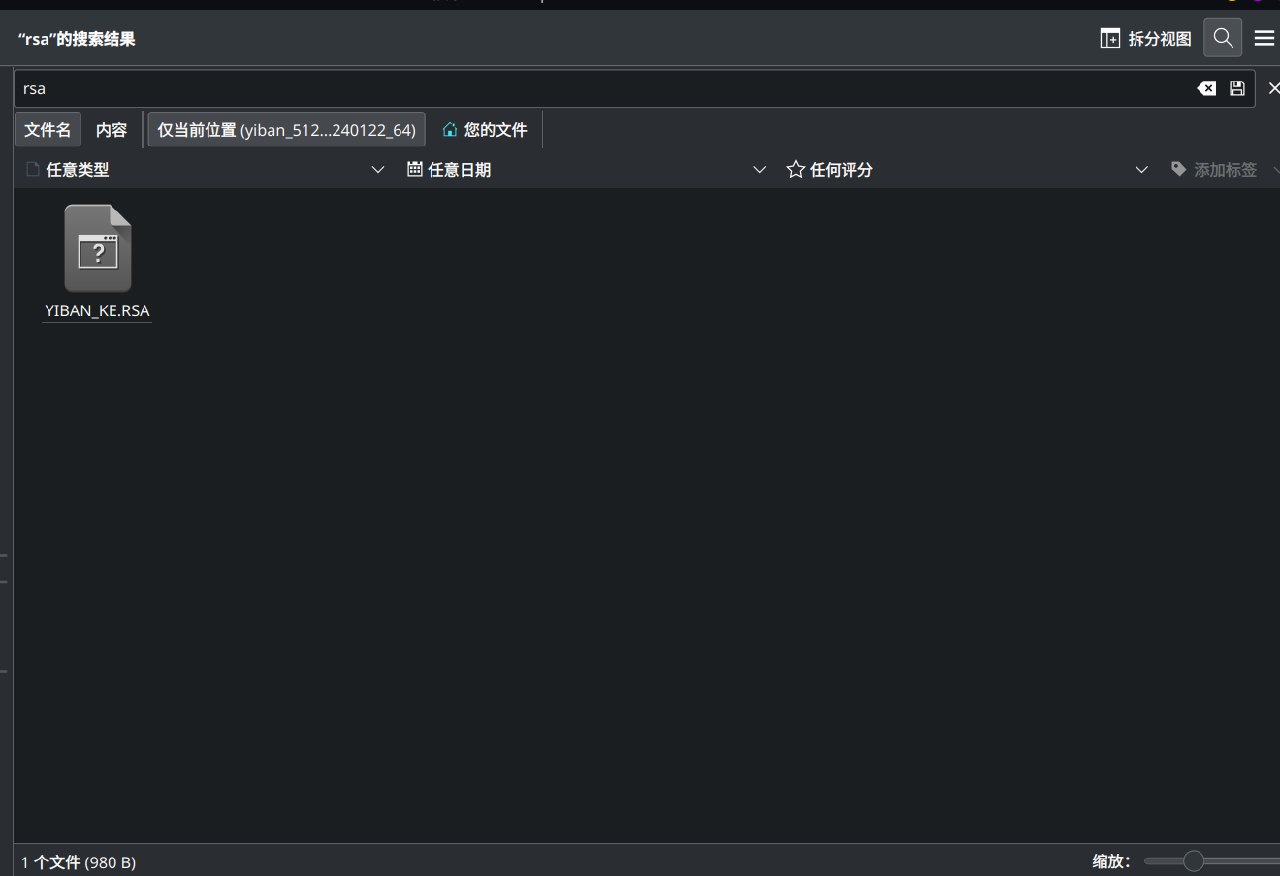
先去官网下载.apk文件,而众所周知,.apk是一种压缩文件,所以直接解压出来,查找一下发现是rsa,然后思考如何拿到公钥。
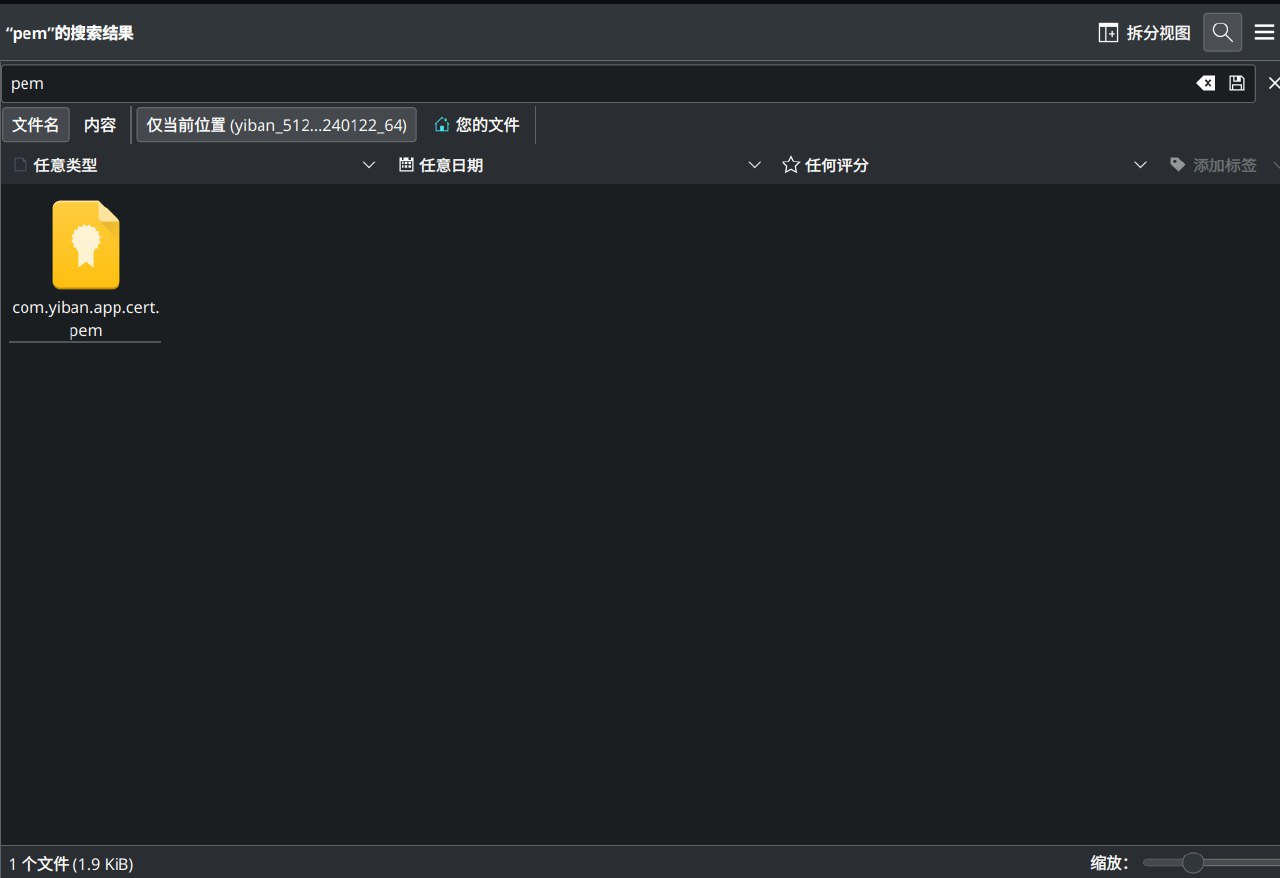
继续find寻找.pem,找到一个证书(本人搞到这里有点绷不住了,真的难绷)
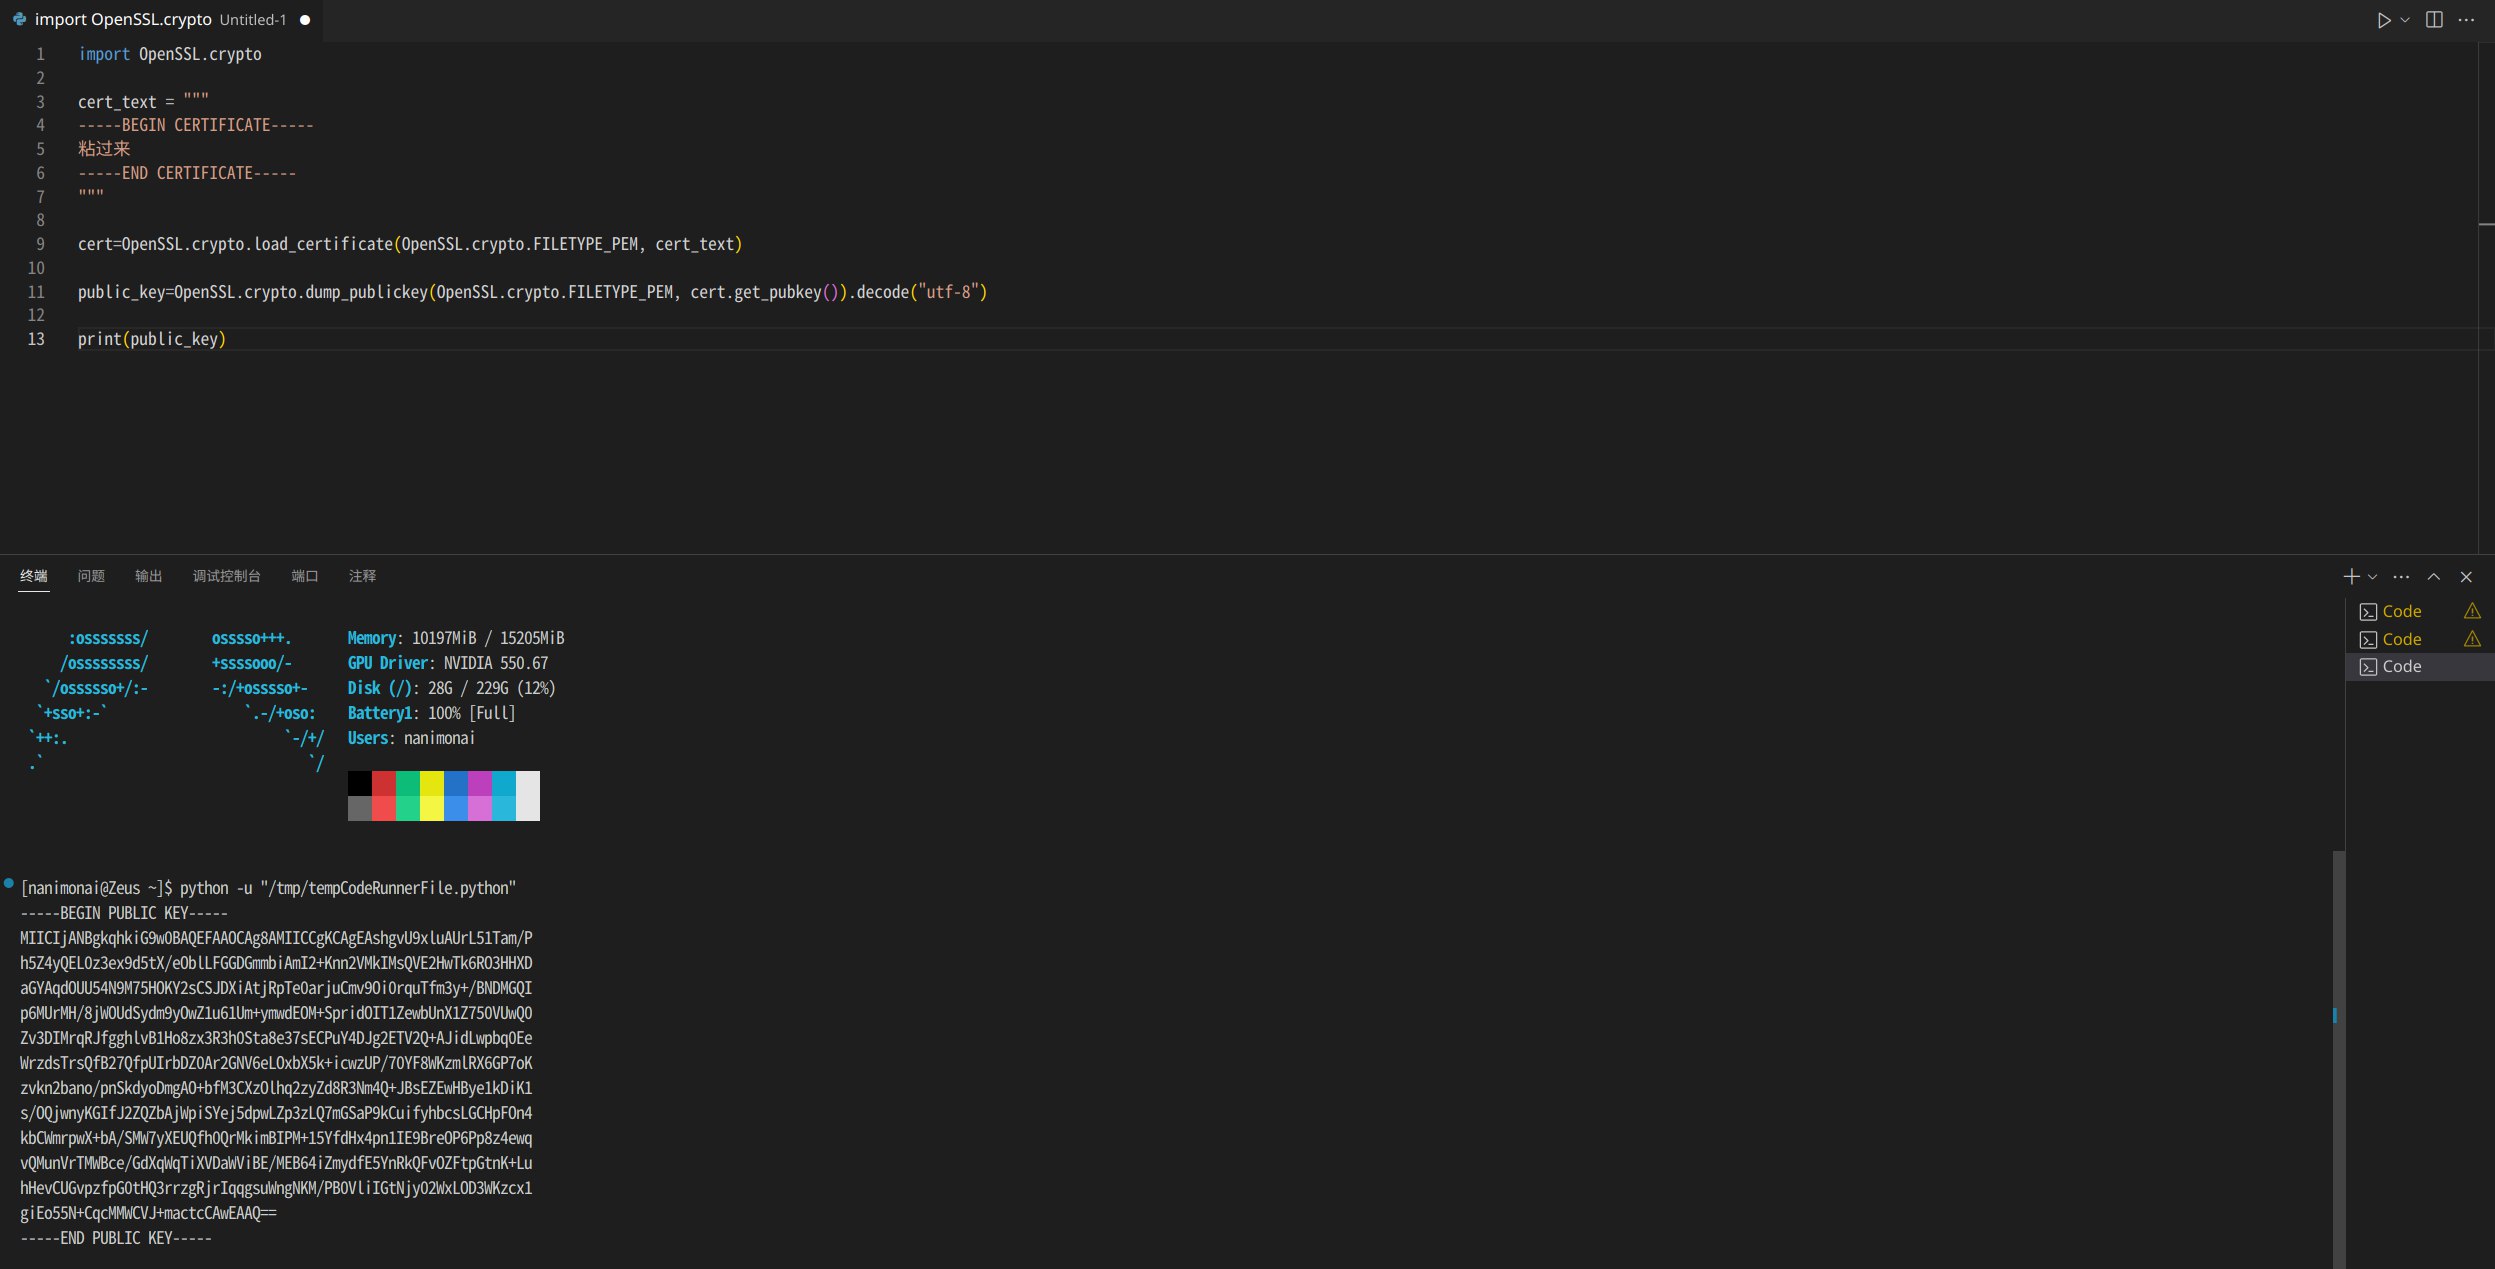
写如下代码以还原出公钥:
import OpenSSL.crypto

cert_text = """
-----BEGIN CERTIFICATE-----
MIIFizCCA3OgAwIBAgIDAJY4MA0GCSqGSIb3DQEBCwUAMIGAMQswCQYDVQQGEwJD
TjEQMA4GA1UECAwHQmVpamluZzEMMAoGA1UECgwDTVNBMREwDwYDVQQLDAhPQUlE
X1NESzEeMBwGA1UEAwwVY29tLmJ1bi5taWl0bWRpZC5zaWduMR4wHAYJKoZIhvcN
AQkBFg9tc2FAY2FpY3QuYWMuY24wHhcNMjQwMTA3MTQ0ODU1WhcNMjUwMTA3MTQ0
ODU1WjB9MQswCQYDVQQGEwJDTjEQMA4GA1UECAwHQmVpamluZzEQMA4GA1UEBwwH
QmVpamluZzEQMA4GA1UECgwHd2phY2tlcjEWMBQGA1UEAwwNY29tLnlpYmFuLmFw
cDEgMB4GCSqGSIb3DQEJARYRd2FuZ2ppZTJAeWliYW4uY24wggIiMA0GCSqGSIb3
DQEBAQUAA4ICDwAwggIKAoICAQCyGC9T3GW4BSsvnVNqb8+HlnjJAQvTPd7H13m1
f945uUsUYYMaaZuICYjb4qefZUyQgyxBUTYfBOTpE7ccdcNoZgCp05RTng30zvkc
4pjawJIkNeIC2NGlN7RquO4Ka/06LSuq5N+bfL78E0MwZAinoxSswf/yNY5R1LJ2
b3I7BnW7rVSb7KbB0Q4z5KmuJ04hPVl7BtSdfVnvnRVTBDRm/cMgyupEl+CCGW8H
UejzPHdHeHRK1rx7fuwQI+5jgMmDYRNXZD4AmJ0vClurQR5avN2xOuxB8HbtB+lQ
itsNnQCvYY1Xp4s7FtfmT6JzDNQ//vRgXxYrOaVFfoY/ugrO+SfZtqej+mdKR3Kg
OaAA75t8zcJfM6WGrbPJl3xHc2bhD4kGwRkTAcHJ7WQOIrWz85CPCfIoYh8nZlBl
sCNamJJh6Pl2nAtmnfMtDuYZJo/2QK6J/KFtywsYIekU6fiRsJaaunBf5sD9Ixbv
JcRRB+HRCsySKYEg8z7Xlh90fHimfUgT0Gt44/o+nzPh7Cq9Ay6dWtMxYFx78Z1e
papOJdUNpZWIET8wQHriJmbJ18TlidGRAW85kW2ka2cr4u6Ed68JQa+nN+kbS0dD
euvOBGOsiqqCy5aeA0oz88HRWWIga02PLTZbEs4PdYrNzHWCISjnk34KpwwxYJUn
6Zpy1wIDAQABoxAwDjAMBgNVHRMBAf8EAjAAMA0GCSqGSIb3DQEBCwUAA4ICAQAk
o30meLI9Un/7KoUekSMhterJ6K11cHKAa+WQqqzp8If+gIhjsyYk7Wf1fgStvoNu
jILWSAfe2C2k74QrlVsUFXue2Ekc+eyDbUhwOi4rVju68/eu4HSpdIUbFQ7ZpivC
adjw7qfN90sp6S+O/dDQ9SzUPBpjMQQ6ZvSTFv7TtZ1cjzOpcfogrDGyOe+mE5Rv
xT3IaWFBcY2fe8lh+/7mJ27A5XgCka1LTZ2OFwI4d1gPWRhwi7R0p4rGhtmk2JJG
viz1rPn8pBBeR5zcwHFuDAbL/1C9d6rZ5lajycrdPZzbcuFAzx7NPafiMsyMYwBK
9oQDIjS5UmfMt+lMFk37yCesFqxq/DOIPm1Hz3N1t5RpcZuwIkCzXYhtOkCbu9SZ
xKqxztpcA5ySf3DWH4TIxKGXxIlC5pr2F4HsmKDIAO/1O6HXI0Bo+s/3KsDS/IMV
nlqKu1WUKUZJebjN/CL61ChfHjkmogslgTkQpJnGsWsix3v0nBFjpbOm/oXYYMJy
p+aMzppKaLx3mniXW/kimteNKu8EdeE7x/QeEIk5IUotfRPAeydVk9yqf+c4ClS9
YwVFAqIDzbC3nLBBXb36WNOoG+MFwWkjKoPhtIoLysTN1gNuFYUlJ1JptoP0Pe0I
k5FWnRRk1vKUktYUfMJE4PQg4sWxZhGkKrGU5zVLsg==
-----END CERTIFICATE-----
"""

cert=OpenSSL.crypto.load_certificate(OpenSSL.crypto.FILETYPE_PEM, cert_text)

public_key=OpenSSL.crypto.dump_publickey(OpenSSL.crypto.FILETYPE_PEM, cert.get_pubkey()).decode("utf-8")

print(public_key)
得出公钥就够用了:
第二步
获取cookie,参考github可得:
def auth(self):
    COOKIES = {}
    CSRF = "00000000000000000000000000000000"
    HEADERS = {
        "Origin": "m.yiban.cn",
        "origin":"api.uyiban.com",
        "origin":"https://c.uyiban.com",
        "authority": "api.uyiban.com",
        "AppVersion": "5.0.17",
        "x-requested-with": "com.yiban.app",
        "user-agent":"Mozilla/5.0 (Linux; Android 12; XIAOMI Build/SKQ1.211006.001; wv) AppleWebKit/537.36 (KHTML, like Gecko) Version/4.0 Chrome/112.0.5615.48 Mobile Safari/537.36;webank/h5face;webank/1.0 yiban_android/5.0.17"
        }
    iapp = requests.get("http://f.yiban.cn/iapp/index?act=iapp7463", headers=HEADERS, allow_redirects=False, cookies=COOKIES) # 利用 loginToken 访问获取 verifyRequest跳转数据
    # 此处cookie带有 "loginToken" = “cdd6d4432743414c9e1faf3e792*****”
    act = iapp.headers["Location"] # 返回302跳转目标
    verifyRequest = re.findall(r"verify_request=(.*?)&", act)[0] # 正则取302跳转目标,得到 verify_request 数据
    json = requests.get("https://api.uyiban.com/base/c/auth/yiban?verifyRequest=" + verifyRequest + "&CSRF=" + CSRF, headers=HEADERS, allow_redirects=False, cookies={'csrf_token': CSRF})
    cookies = requests.utils.dict_from_cookiejar(json.cookies) # 获取cookie
    Attendancecookies = cookies # 签到cookies赋值self.Attendancecookies
    print('Location:',act,"\n")
    print('cookies:',Attendancecookies,"\n")

    ###打印数据:
    Location: https://c.uyiban.com/#/?verify_request=c9e814****53de92ccc', 'cpi': 'eyJD******%3D%3D', 'is_certified': '1'}
    cookies: {'PHPSESSID': 'fa1a28bc38cc**c4b1e87a8ce51f****', 'cpi': 'eyJDaG**%3D%3D', 'is_certified': '1'}
All right. 现在只需要PHPSESSID.
第三步
进行ADB调试,其中挺复杂的。我未来也要尝试一下有没有更加简单的调试方法。首先你PC得有Chrome,Firefox就不行。我Linux上面用的是Chromium。第一次尝试的时候移动端使用的是旧版本的Kiwi Browser,导致 chrome://inspect/#devices 这个界面没有inspect fallback选项。更新就行了。
在kiwi上找到Network Conditions,把用户代理叉掉并自定义写上MicroMessenger。

这个其实可以直接在控制台输入命令获取(忘记截图了,可以自己去试一下):
console.log("User-Agent:", navigator.userAgent);
直接从中间几个开始分析(其实是依葫芦画瓢),能够成功找到https://api.uyiban.com/nightAttendance/student/index/signIn?CSRF=…
以及https://api.uyiban.com/nightAttendance/student/index/signPosition?CSRF=…
这样就可以进行测试,API 是 RESTful 标准。从登录开始追踪,使用curl去调试。
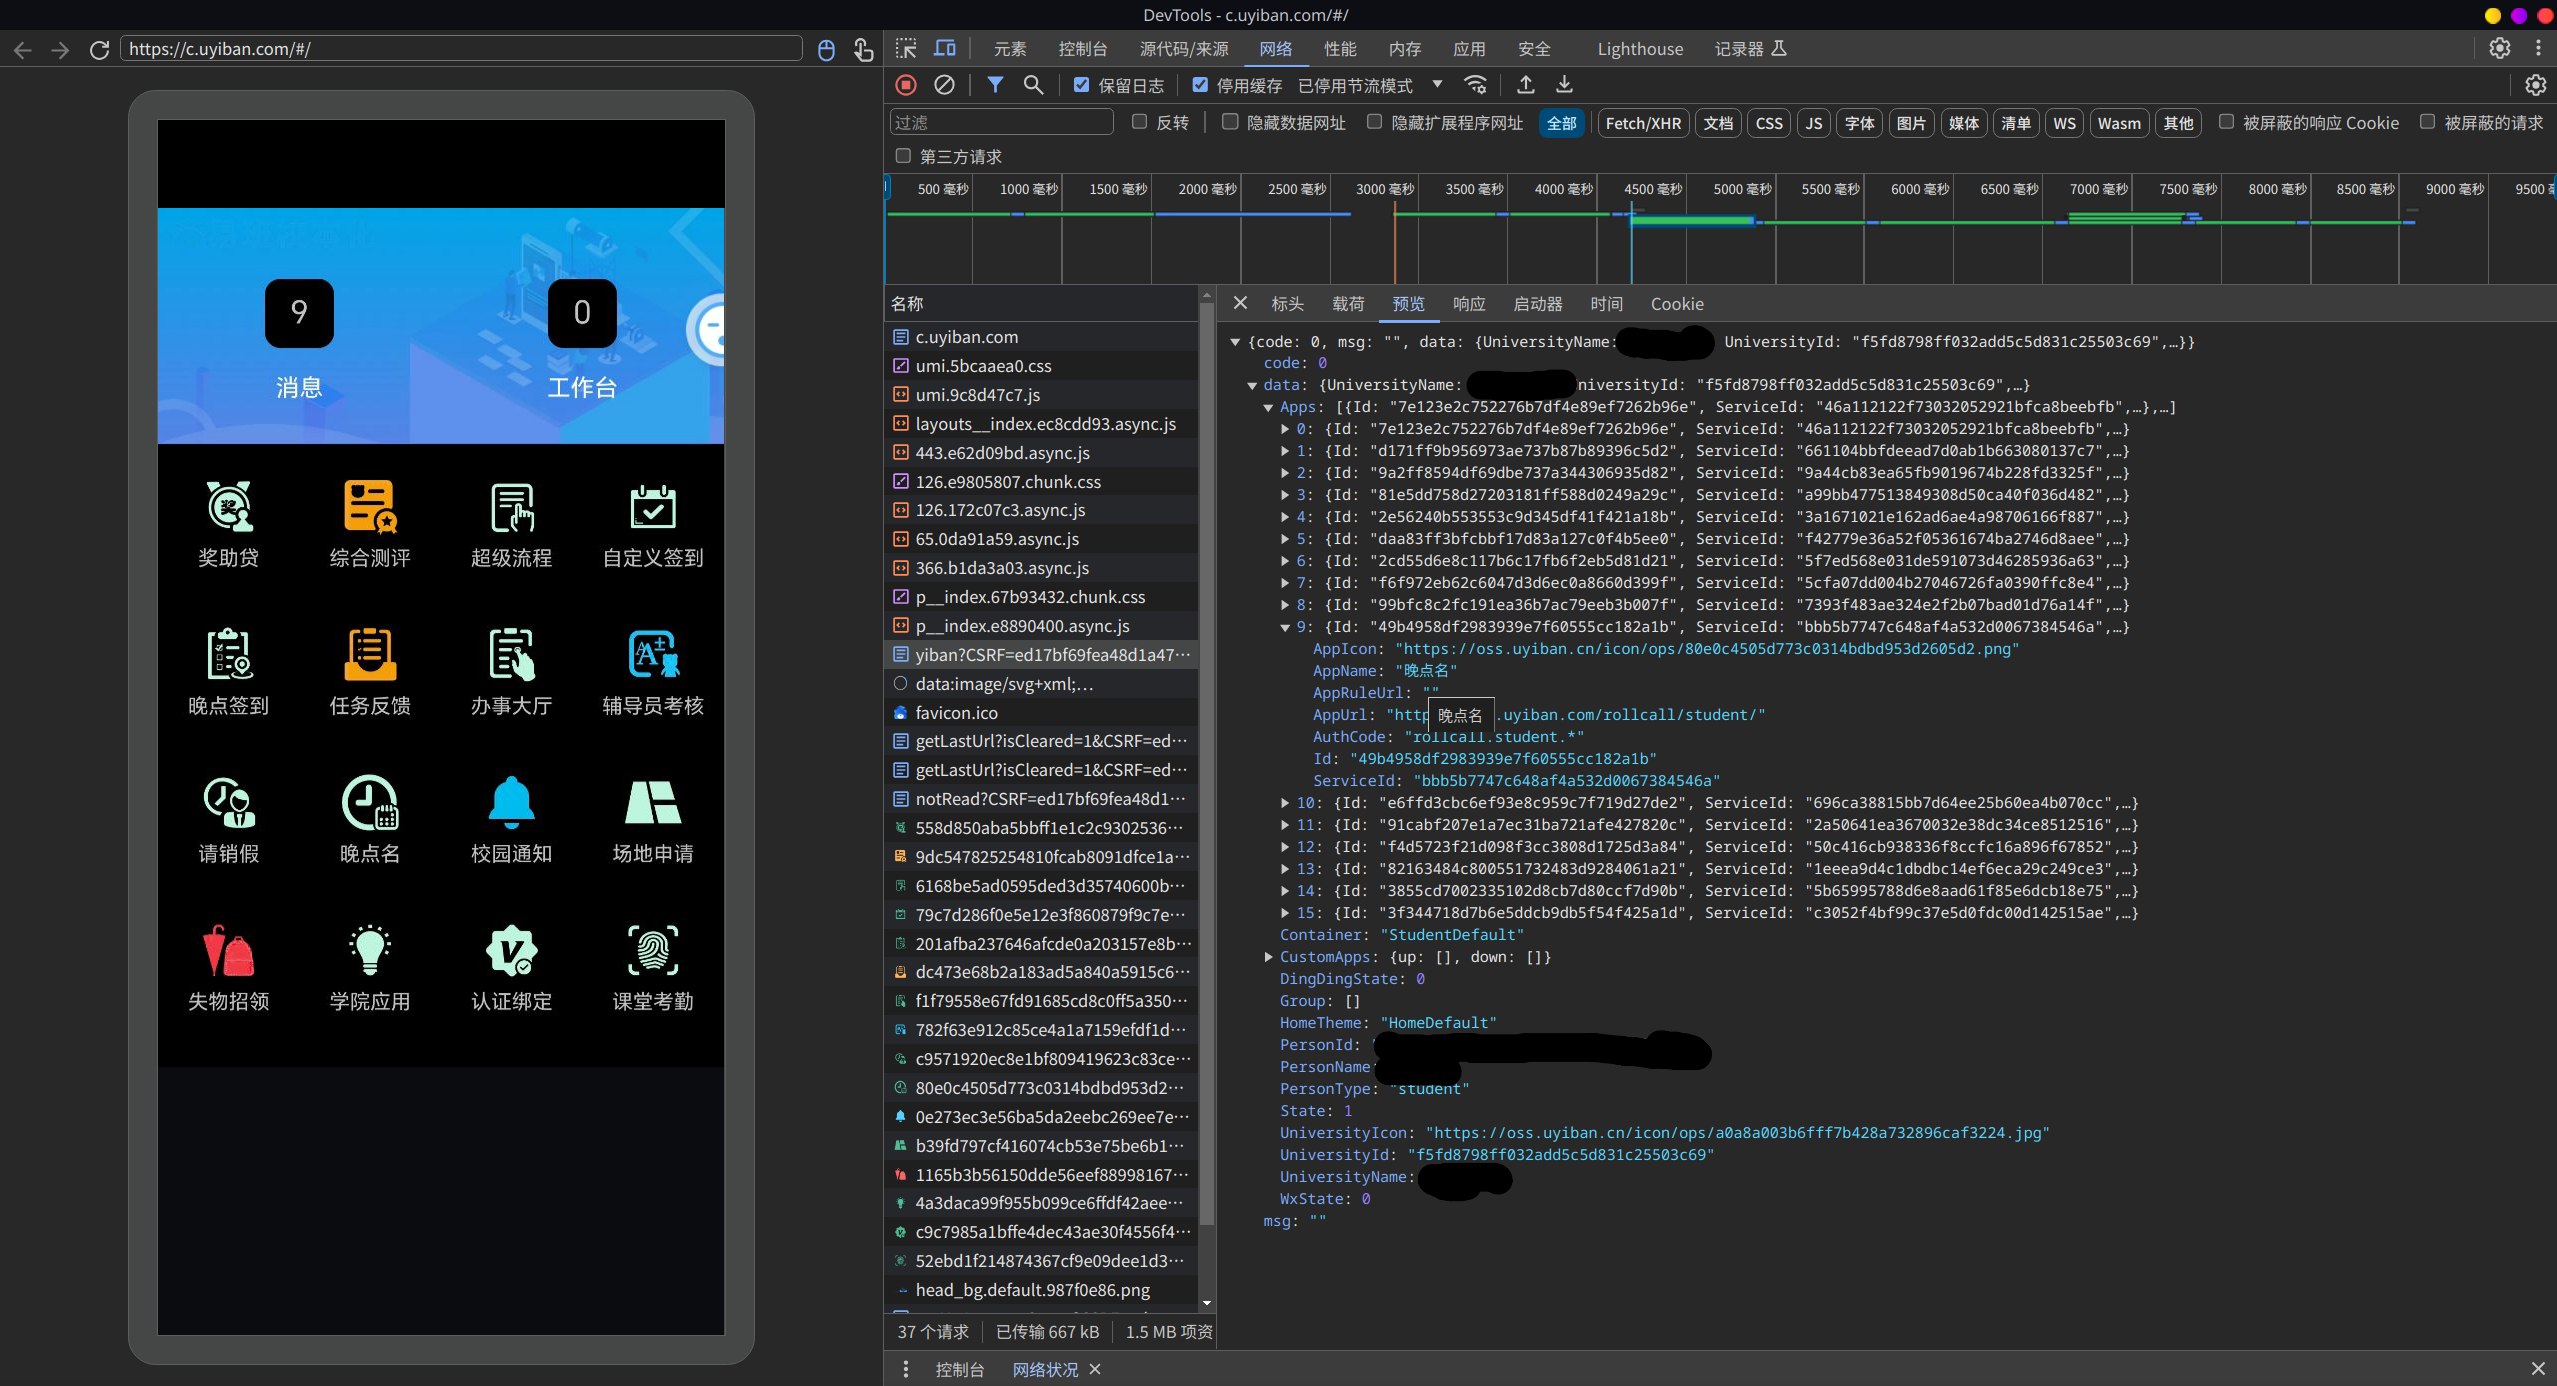
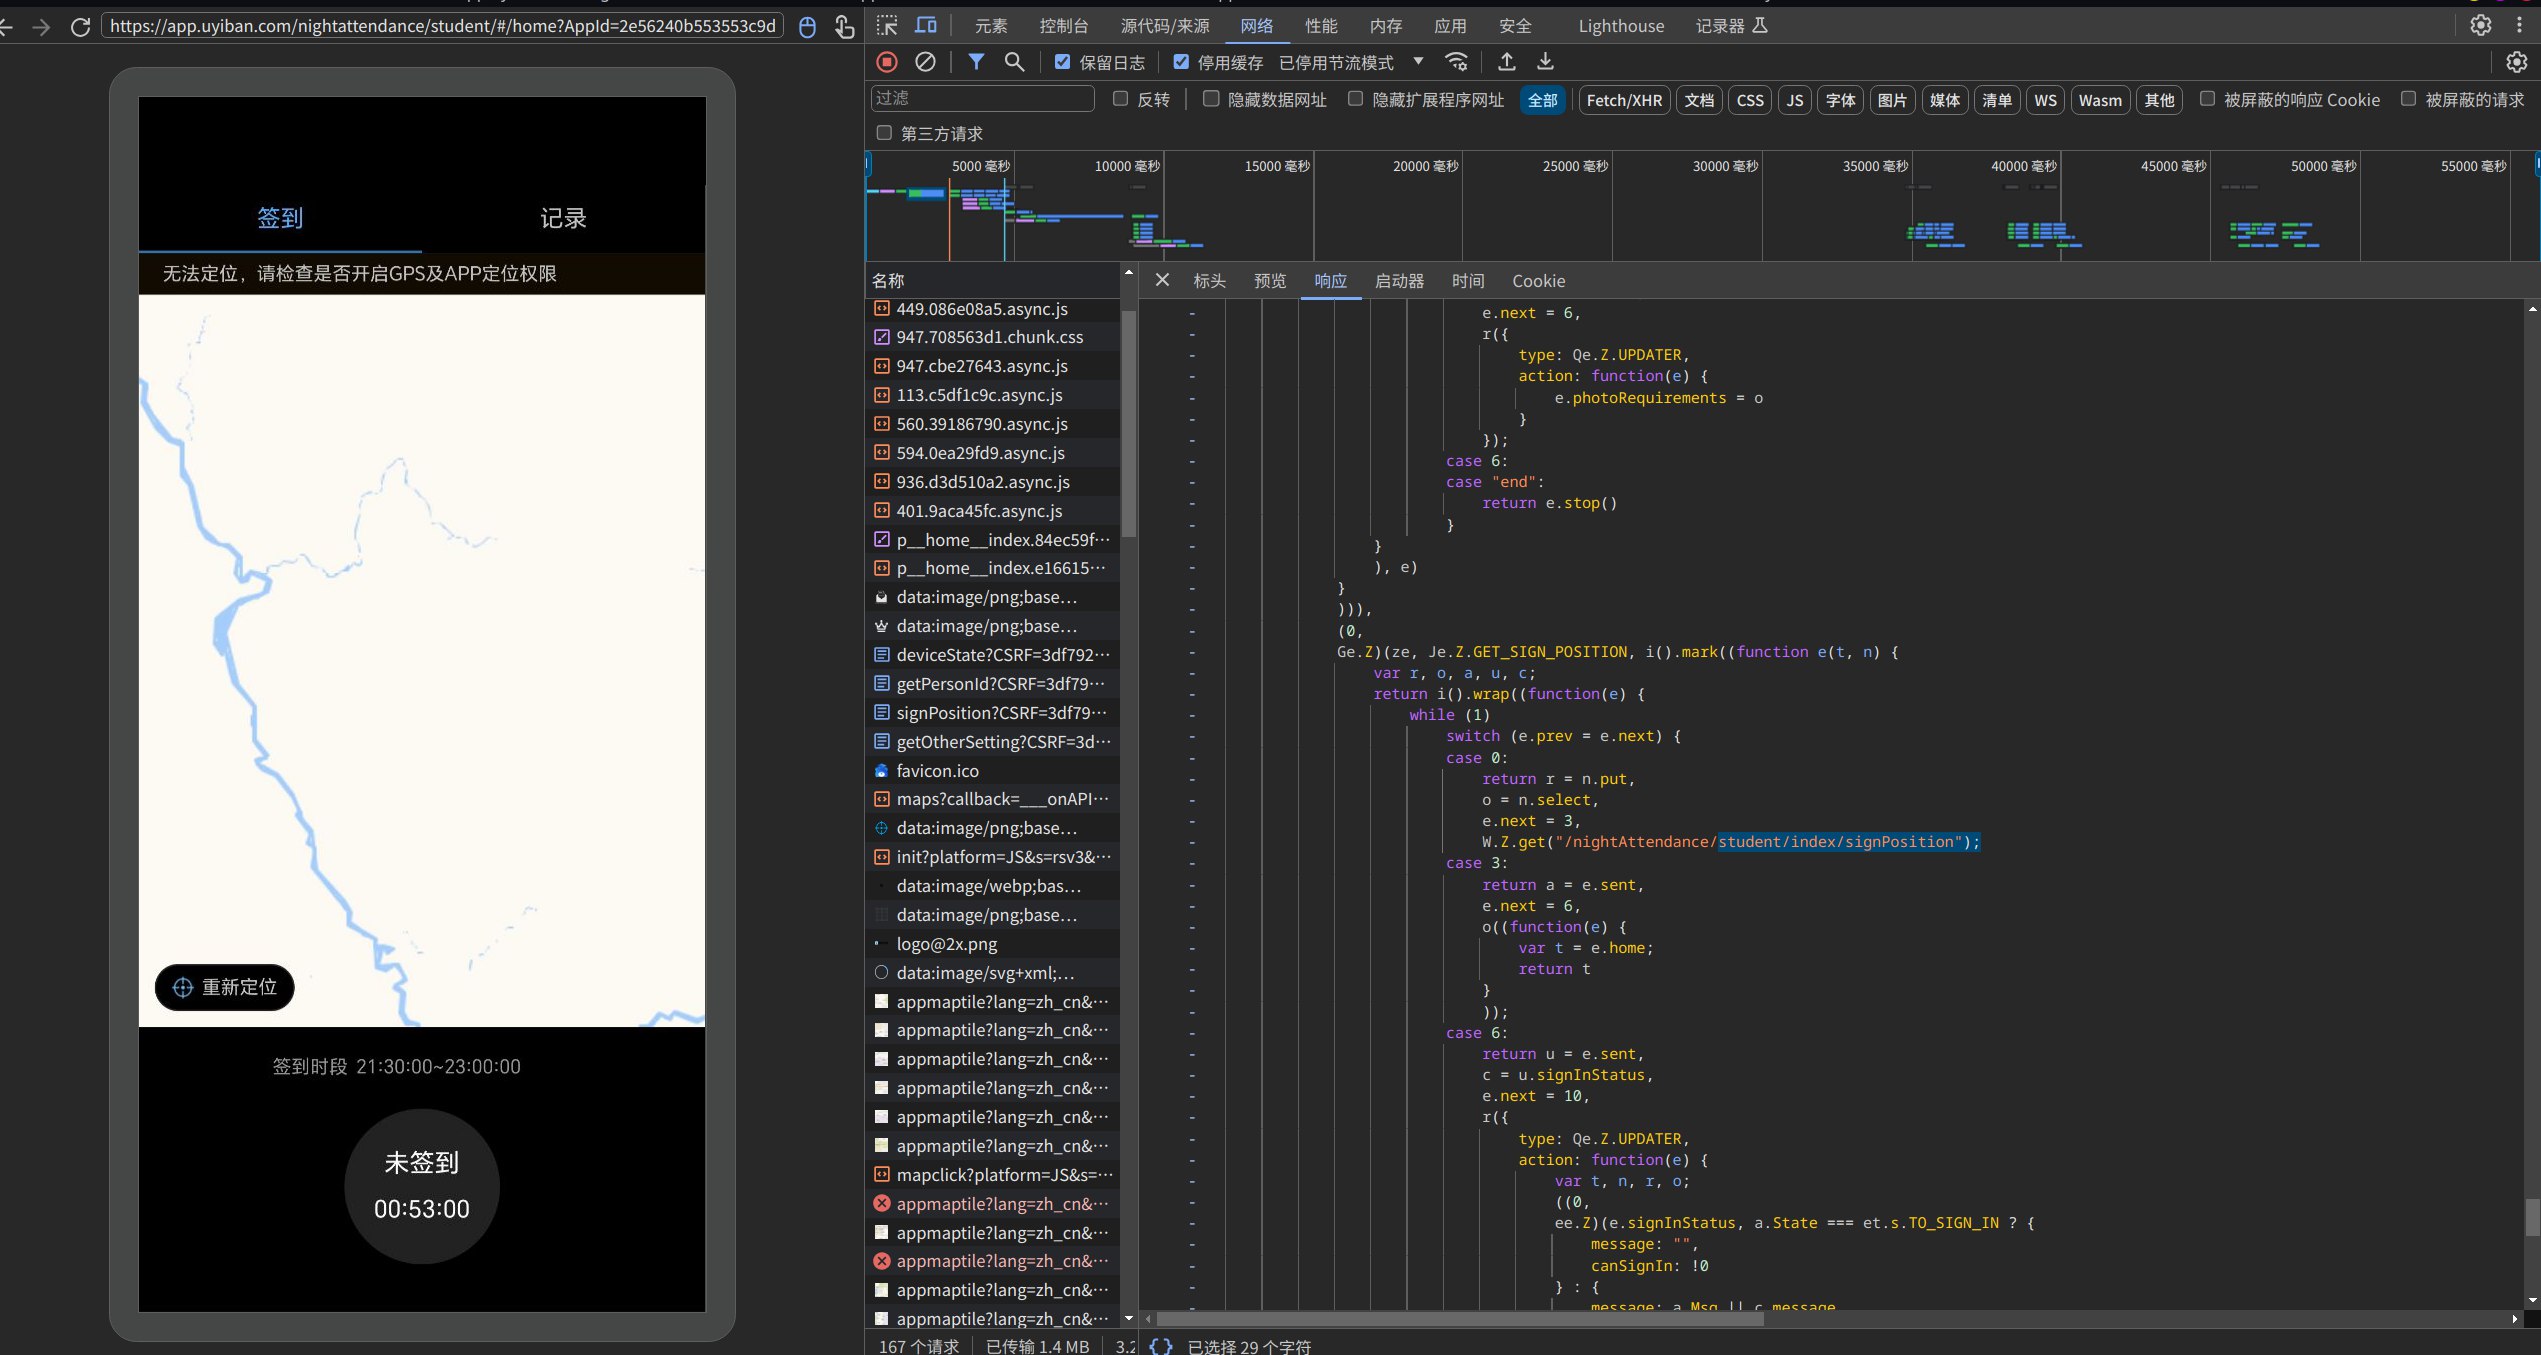
错误的都是{‘code’: 500, ‘msg’: ‘非法签到’, ‘data’: None} 0.0
签到成功会返回{‘code’: 0, ‘msg’: ‘’, ‘data’: True}
第四步 前人的智慧!
脚本是大爱无私宽仁的Mike修改的,最初版是来自this思路也是借鉴于此,上面也算是重走一遍。真所谓巧夺天工,令人敬佩!
import json
import re
import sys
import os
import pickle
import time
import urllib
import jsonpath
from urllib import parse
import random
import requests
import numpy
import base64
import msvcrt
try:
    from Crypto.Cipher import PKCS1_v1_5
    from Crypto.PublicKey import RSA
except ModuleNotFoundError:
    print("缺少pycryptodome依赖!程序将尝试安装依赖!")
    os.system("pip3 install pycryptodome -i https://pypi.tuna.tsinghua.edu.cn/simple")
    os.execl(sys.executable, 'python3', __file__, *sys.argv)

def encryptPassword(pwd): # 登录密码加密
    # 密码加密
    PUBLIC_KEY = '''-----BEGIN PUBLIC KEY-----
MIICIjANBgkqhkiG9w0BAQEFAAOCAg8AMIICCgKCAgEAzq0rgsM++ZxLRGHpdfre
Hu6UXhdlUS5P2WOxRG14qU8/iWSb/CkOqgOl8AGcOhlthkvolCdpUvVcVsVUxBv0
YRN0Jb64zPrn5aLVwQT4RJn5tXvoqLdHIXis7pljXAMDPVZOVlWJkDMk8YU6HDaA
MqsD6l5p9lg2LMP4OhMgaPX+CkO370LB5vRjJTHp03n+IqfxXoC7DEd+kxRIEM2C
EDgUSYDJBDgwBvGALZmvB/a1b0im9t1P/EmnuE7uN9NRFoWyVpOiEwo/Ti7rmJGf
qNT3vvtfWo4nXsm1rYQXsPayoKDSRaba3gFY/1SYWLAuSO2q2da5ZCcsAk5RKy0V
c1hUg8n6y0YLAvuzoXY5VyNMXkhH5Zc5Kg64b5RxILeZpZG0MV7GFY3sw//k7SNg
darKT8A0Iv3l3lfguX3HNi6dkf97kS/EiA0tbkIB/JNjv13mq8HL7LijRt2hkKqP
PhQW88xC/exZilU5pAavoZOPuZIOTUHqtpRq4ZeKl+wDf+e5lPYFDpihWGjplGpa
4BOSmGeo/SyVFPji9QF4Pk0DRJF/NjwJoAC60xHAVt5Z4gQSOOOjNZDCswA0ry2L
e8m5cv5vPGY75uVrGqALQ6Xm961PPc5cJ1q7tmEZMj+z5HE7tgAdhiPI6acKgrAv
+1k4N0OVqKamMS+PVpD05hUCAwEAAQ==
-----END PUBLIC KEY-----'''
    cipher = PKCS1_v1_5.new(RSA.importKey(PUBLIC_KEY))
    cipher_text = base64.b64encode(cipher.encrypt(bytes(pwd, encoding="utf8")))
    return cipher_text.decode("utf-8")
####################################################################################################################################################################################################
####################################################################################################################################################################################################

class yiban:
    COOKIES = {}
    def __init__(self, mobile, password): # 全局变量
        self.mobile = mobile # 登录手机号
        self.password = password # 登录密码
        self.session = requests.session()
        self.HEADERS = {
            "Origin": "m.yiban.cn",
            "origin":"api.uyiban.com",
            "origin":"https://c.uyiban.com",
            "authority": "api.uyiban.com",
            "AppVersion": "5.1.2",
            "x-requested-with": "com.yiban.app",
            "user-agent":"Mozilla/5.0 (Linux; Android 12; Redmi K30 Pro Build/SKQ1.211006.001; wv) AppleWebKit/537.36 (KHTML, like Gecko) Version/4.0 Chrome/112.0.5615.48 Mobile Safari/537.36;webank/h5face;webank/1.0 yiban_android/5.0.17"
            }
        self.Attendancecookies = {}
        self.CSRF = "00000000000000000000000000000000"

    def login(self): # 登录
        params = {
            "mobile": self.mobile, #登录手机号
            "password": encryptPassword(self.password), #RSA加密后的登录密码
            "ct": "2", #固定参数
            "identify": "0", #固定参数
        }
        # 配置登录数据
        response = requests.post("https://m.yiban.cn/api/v4/passport/login", data=params, allow_redirects=False, cookies=self.COOKIES, headers=self.HEADERS).json()
        if response is not None and response["response"] == 100:
            self.access_token = response["data"]["access_token"]
            self.HEADERS["Authorization"] = "Bearer " + self.access_token
            # 增加cookie
            self.COOKIES["loginToken"] = self.access_token
            print('用户信息:',response,"\n")
            print('loginToken:',self.access_token,"\n")
            print('用户姓名:',response["data"]["user"]["name"],"\n手机号码:",response["data"]["user"]["phone"])
            return 1
        else:
            print(response)
            return self.mobile
        #返回https://f.yiban.cn/iapp/index?act=iapp7463所需的Cookie“loginToken=ce196e5fb2900bc35b44e1f1b4ed****”


        #通过获取的loginToken访问iapp后台得到值verifyRequest
        #利用verifyRequest访问api获取签到用的cookie
        #返回cookie内容范例
        #{'PHPSESSID': '1aef34b976315dca8400711255f1a9af', 'cpi': 'eyJDaGFubmVsIjoieWliYW......TliNWViZTUxYWMifQ%3D%3D', 'is_certified': '1'}
        #PHPSESSID为关键值,有这一个参数就可以访问签到等相关内容
        #cpi 使用base64编码 有个人相关信息
    def auth(self): # 获取签到cookie
        iapp = requests.get("http://f.yiban.cn/iapp/index?act=iapp7463", headers=self.HEADERS, allow_redirects=False, cookies=self.COOKIES) # 利用 loginToken 访问获取 verifyRequest
        act = iapp.headers["Location"] # 返回302跳转目标
        verifyRequest = re.findall(r"verify_request=(.*?)&", act)[0] # 正则取302跳转目标,得到 verify_request 数据
        json = requests.get("https://api.uyiban.com/base/c/auth/yiban?verifyRequest=" + verifyRequest + "&CSRF=" + self.CSRF, headers=self.HEADERS, allow_redirects=False, cookies={'csrf_token': self.CSRF})
        #访问api获取cookie CSRF值按此可用,只验证位数
        cookies = requests.utils.dict_from_cookiejar(json.cookies) # 获取cookie
        self.Attendancecookies = cookies # 签到cookies赋值self.Attendancecookies
        print('Location:',act,"\n")
        print('cookies:',self.Attendancecookies,"\n")
        return

    def authorization(self, testauth): # 授权校本化
        self.testauth = testauth
        authhtml = requests.get("https://oauth.yiban.cn/code/html?client_id=95626fa3080300ea&redirect_uri=https://f.yiban.cn/iapp7463") # 利用 loginToken 访问获取 verifyRequest
        HTML_PUBLIC_KEY = re.search('<input type="test" id="key" value="((?:.|\n)+)?" style="display:none">',authhtml.text)[1] # 获取网页签到加密 password 证书
        webcookies = requests.utils.dict_from_cookiejar(authhtml.cookies) # 获取校本化授权 cookie    登录需要
        print()
        print("获取的网页cookie:",webcookies)
        print("获取的网页加密证书:",HTML_PUBLIC_KEY,"\n")
        HTML_cipher = PKCS1_v1_5.new(RSA.importKey(HTML_PUBLIC_KEY))
        HTML_cipher_text = base64.b64encode(HTML_cipher.encrypt(bytes(self.password, encoding="utf8")))
        HTML_cipher_decode = HTML_cipher_text.decode("utf-8")
        print("密码网页加密结果:",HTML_cipher_decode)
        webparams = {
            "oauth_uname": self.mobile , # 账号
            "oauth_upwd": HTML_cipher_decode , # 加密后密码
            "client_id": "95626fa3080300ea", # 应用端编号
            "redirect_uri": "http://f.yiban.cn/iapp7463", # 应用端回调地址
            }
        webauth = requests.post("https://oauth.yiban.cn/code/usersure", data=webparams, cookies=webcookies, headers=self.HEADERS).json()
        print("授权结果",webauth,"\n")
        print("授权成功,返回获取签到信息中...")
        return

    def signPosition(self):
        Position = requests.get("https://api.uyiban.com/nightAttendance/student/index/signPosition?CSRF=" + self.CSRF, allow_redirects=False, cookies={'PHPSESSID': self.Attendancecookies['PHPSESSID'], 'csrf_token': self.CSRF}, headers=self.HEADERS).json()
        if Position["code"] == 0: # 判断是否登录成功
            print("校本化已授权,有晚签任务\n")
            print("可签到数据:",Position,"\n")
            State=Position["data"]["State"] # 获取状态码
            Msg=Position["data"]["Msg"] # 获取返回信息
            StartTime=Position["data"]["Range"]["StartTime"] # 获取签到开始时间
            self.StartTime =  StartTime
            EndTime=Position["data"]["Range"]["EndTime"] # 获取签到结束时间
            pause = StartTime - int(time.time()) # 获取系统现在时间
            if State == 2: # 没有签到任务 如学校没有晚签
                print("您",Position["data"]["Msg"])
                return
            else:
                if State == 3: # 已签到
                    print("[*] 签到接口返回数据:",Position["data"]["Msg"])
                    return
                else:
                    self.Address=jsonpath.jsonpath(Position,'$...Address')[0] # 获取可签到位置 地址
                    self.LngLat=jsonpath.jsonpath(Position,'$...LngLat')[0] # 获取可签到位置 经纬度
                    self.lonss = '%.6f' %float(round(float(self.LngLat.split(",")[0]),3) + float(random.uniform(0.000100,0.000999))) # 根据地址随机修改经度后3位,达到每次定位位置不一样
                    self.latss = '%.6f' %float(round(float(self.LngLat.split(",")[1]),3) + float(random.uniform(0.000100,0.000999))) # 根据地址随机修改纬度后3位,达到每次定位位置不一样
                    if State == 0: # 已经到达签到时间
                        print("可以签到,立即执行!\n")
                        self.nightAttendance() # 签到跳转
                    else:
                        if State == 1: # 还未开始签到
                            pause = StartTime - int(time.time()) # 获取剩余时间
                            while pause >= 60 :
                                list = ["\\", "|", "/", "—"]
                                index = pause % 4
                                print("[*] 距签到时间还有 {} 秒 {}".format(pause,list[index]), end="\r", flush=True)
                                pause = StartTime - int(time.time())
                                time.sleep(1)
                            else:
                                while pause <= 60 and pause >=10 :
                                    print("[*] 距签到时间还有 {} 秒 {}".format(pause,list[index]), end="\r", flush=True)
                                    pause = StartTime - int(time.time())
                                    time.sleep(0.5)
                                else:
                                    while pause <= 10 :
                                        print("[*] 距签到时间还有 {} 秒 {}").format(pause,list[index], end="\r", flush=True)
                                        pause = StartTime - int(time.time())
                                        while pause <= 0.25 :
                                            print("到达签到时间!")
                                            self.nightAttendance() # 签到跳转
                                            return
                                        time.sleep(0.25)
            if Position["code"] == 999:
                print("[*] 晚签信息获取失败\n[*] 有可能是校本化未授权或您的签到页面非本脚本所适配")
                self.authorization()
        return

    def nightAttendance(self): # 执行签到
        paramss = {
            "Code": "",
            "PhoneModel": "",
            "SignInfo": '{"Reason":"","AttachmentFileName":"","LngLat":"' + self.lonss + ',' + self.latss + '","Address":"' + self.Address + '"}',
            "OutState": "1"
            }
        nightsign = requests.post("https://api.uyiban.com/nightAttendance/student/index/signIn?CSRF=" + self.Attendancecookies['PHPSESSID'], data=paramss, cookies={'csrf_token': self.Attendancecookies['PHPSESSID'], 'PHPSESSID': self.Attendancecookies['PHPSESSID']}, headers=self.HEADERS).json()
        print("签到返回数据:",nightsign)
        #print(nightsign)
        return self.signPosition() # 跳转回signPosition验证是否签到成功

    def loginin(self): # 登陆校验
        # 应当先判断列表账号是否都能正常登陆
        loginin = self.login() # 登录
        if loginin != 1:
            print("用户",loginin,"登陆失败,请处理")
            print("按任意键退出脚本")
            ord(msvcrt.getch())
            sys.exit()
        self.authorization(0) # 校本化授权先执行
        return

    def setall(self): # 多人签到
        loginin = self.login() # 登录
        self.auth() # 授权
        self.signPosition() # 判断能否签到&自动跳转签到
        #self.authorization(0) # 校本化授权 已写入
        return
def save_accounts(accounts):
    with open("accounts.txt", "w") as f:
        for account in accounts:
            f.write(f"{account.mobile},{account.password}\n")
def load_accounts():
    accounts = []
    if os.path.exists("accounts.txt"):
        with open("accounts.txt", "r") as f:
            for line in f:
                mobile, password = line.strip().split(',')
                accounts.append(yiban(mobile, password))
    return accounts
def display_accounts(accounts):
    print("当前账户列表:")
    for idx, account in enumerate(accounts, start=1):
        print(f"{idx}. {account.mobile}")


def main():
    accounts, disturb_mode, disturb_count = load_accounts()
    if disturb_mode == 'on' and disturb_count > 0:
        print("免打扰模式开启,自动执行...")
        disturb_count -= 1
    else:
        action = '继续'
        while action.lower() == '继续':
            display_accounts(accounts)
            choice = input("要修改或增加账号吗?(修改/增加/执行): ")

            if choice.lower() == '修改':
                index = int(input("请输入要修改的账号序号: ")) - 1
                if 0 <= index < len(accounts):
                    new_mobile = input("输入新的手机号: ")
                    new_password = input("输入新的密码: ")
                    accounts[index] = yiban(new_mobile, new_password)
                    save_accounts(accounts, disturb_mode, disturb_count)
                    print("账户已更新")
            elif choice.lower() == '增加':
                num_new_accounts = int(input("请输入要增加的账户数: "))
                for _ in range(num_new_accounts):
                    mobile = input("请输入新手机号: ")
                    password = input("请输入新密码: ")
                    accounts.append(yiban(mobile, password))
                save_accounts(accounts, disturb_mode, disturb_count)
                print("新账户已添加")
            elif choice.lower() == '执行':
                break

            action = input("是否继续修改或增加账户?(继续/执行): ")

        if disturb_count == 0:  # 当不在免打扰模式或免打扰次数用完时询问
            disturb_mode = 'on' if input("是否开启免打扰模式?(是/否): ").lower() == '是' else 'off'
            disturb_count = 7 if disturb_mode == 'on' else 0

    save_accounts(accounts, disturb_mode, disturb_count)

    for account in accounts:
        account.loginin()
    time.sleep(0.5)
    print("#签到检查通过#################\n")
    for account in accounts:
        account.setall()
    time.sleep(0.1)
    print("##############################")
    print("签到任务已执行完成!")
    sys.exit()


if __name__ == "__main__":
    main()
一点点小改动
这个脚本有几处在Arch Linux上并不适用。
pip会往系统里面带脏东西,所以并不能直接执行pip install。会有如下报错:
pip install numpy
error: externally-managed-environment

× This environment is externally managed
╰─> To install Python packages system-wide, try 'pacman -S
    python-xyz', where xyz is the package you are trying to
    install.

    If you wish to install a non-Arch-packaged Python package,
    create a virtual environment using 'python -m venv path/to/venv'.
    Then use path/to/venv/bin/python and path/to/venv/bin/pip.

    If you wish to install a non-Arch packaged Python application,
    it may be easiest to use 'pipx install xyz', which will manage a
    virtual environment for you. Make sure you have python-pipx
    installed via pacman.

note: If you believe this is a mistake, please contact your Python installation or OS distribution provider. You can override this, at the risk of breaking your Python installation or OS, by passing --break-system-packages.
hint: See PEP 668 for the detailed specification.
最恰当的方法应该是给他来个虚拟环境。且msvcrt是一个Windows特定的模块,在Linux上不可用,可以代码里面直接给它扬了:
...# 上述代码照抄

def loginin(self): # 登陆校验
    # 应当先判断列表账号是否都能正常登陆
    loginin = self.login() # 登录
    if loginin != 1:
        print("用户",loginin,"登陆失败,请处理")
        print("按任意键退出脚本")# 移除了msvcrt.getch(),因为在Linux上不可用
        input("按回车键退出脚本")
        sys.exit()
    self.authorization(0) # 校本化授权先执行
    return

...# 下面照抄
构建虚拟环境需要:
python3 -m venv /path/to/new/virtual/environment

source /path/to/new/virtual/environment/bin/activate

pip install requests numpy jsonpath

deactivate
在你的py文件目录下创建一个.sh:
#!/bin/bash

VENV_DIR="/path/to/your/venv"

SCRIPT_PATH="/path/to/your/script.py"

source "$VENV_DIR/bin/activate"

python "$SCRIPT_PATH"

deactivate

chmod +x /path/to/your/script.sh
/path/to/your/script.sh
然后就是考虑在Linux上如何进行定时任务的问题,经某位lockey朋友启发选择直接上大家所熟悉的cron:
sudo pacman -S cronie
sudo systemctl start cronie.service
sudo systemctl enable cronie.service

crontab -e # 转入nano编辑
0 0 * * * /path/to/your/script.sh # 自行照格式修改

#ctrl+o写入,enter,ctrl+x退出

crontab -l # 检查一下有没有写好
DONE.